AFRICAN | All Recipes | ASIAN | CARIBBEAN | CHICKEN | CHRISTMAS | DINNER | EASTER | GAMEDAY | Healthy Recipes | HOLIDAYS | INDIAN | LUNCH | THANKSGIVING
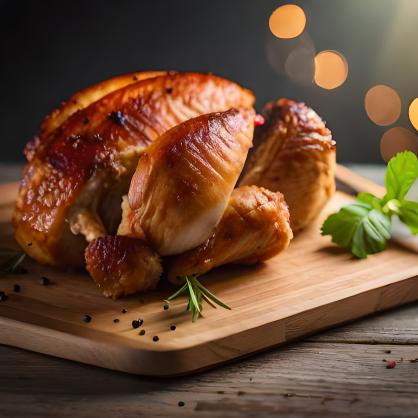
How to Make Rotisserie Chicken at Home
How to Make Rotisserie Chicken at Home: Flavorful and Juicy Rotisserie chicken is a beloved dish known for its succulent meat and crispy skin. While it’s easy to pick up a rotisserie chicken from the store, there’s something incredibly satisfying about making it at home. In this recipe, we’ll walk you through how to create…